Tuesday 16 September 2014

Dusty Cookbook No. 5

It has been a LONG time between dusty cookbooks.
Initially I said that this year I would do one each fortnight - I must have been drunk!
It is now September and my annual total of Dusty Cookbooks is a hefty 4.
Disgraceful!
But let us not dwell on the fact that I have completely fallen off the Dusty Cookbook wagon.
We shall just jump back on and introduce Dusty Cookbook Number 5!


This little baby - complete with very sticky front cover - arrived in a Christmas present from my Mum in 1989.
Inside amongst the very '80's photos, I have found only a few ticks beside a couple of recipes.  This book, I have to admit, is one that usually stays on the shelf collecting dust.

NOT TODAY!!


"Hundreds & Thousands Biscuits" are just out of the oven making my kitchen smell fabulous.
 

Just biting into one now ……..

Hmm, they are OK but you need a big glass of milk or a cup of tea to wash them down - they are a bit dry.
Not sure if they are worthy of a tick in the margin (the Ohjoh measure of recipe greatness).  
Will see what the smalls say when they arrive home from school.   
Mind you, after school they would eat the dog if he looked like a biscuit!

Have you been dusting off your cookbooks?  Have you discovered any fabulous new (yet old) recipes??

Cheers
Jenny

Wednesday 3 September 2014

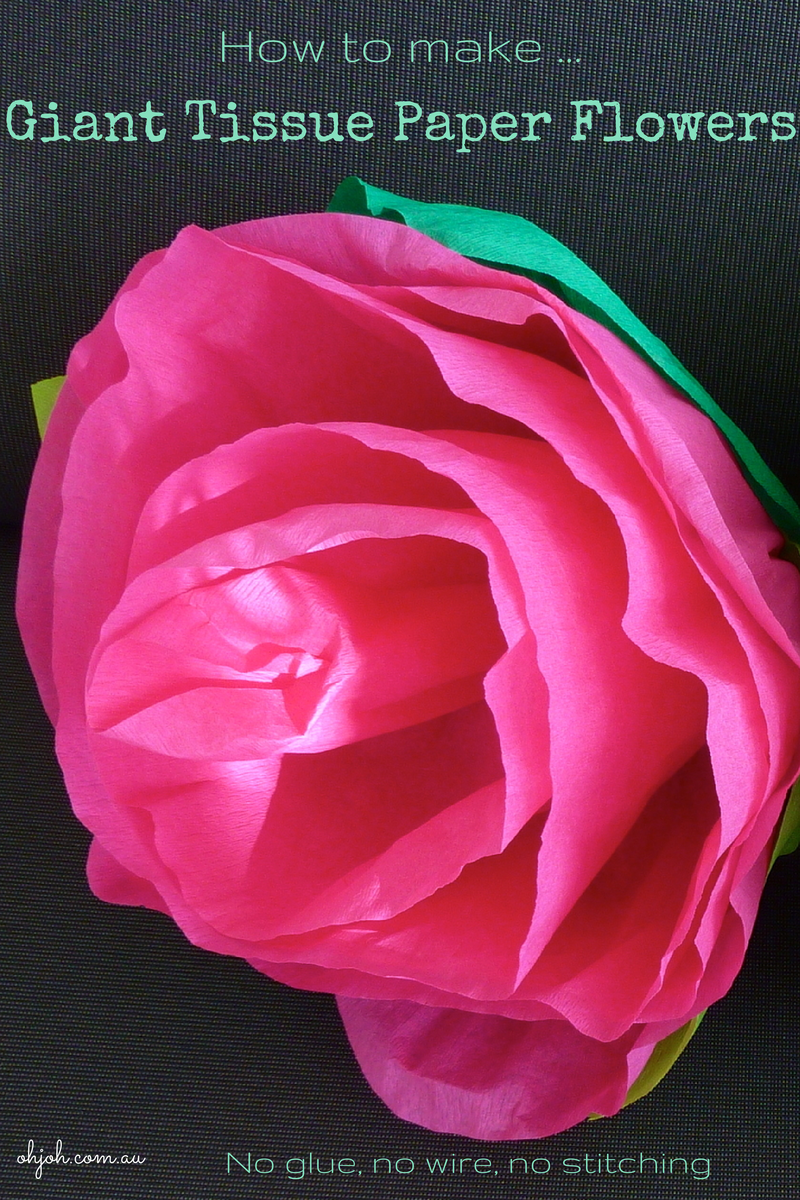
Let's Make Giant Tissue Paper Flowers


We had a little kid's garden party here recently.
I thought I would nip into Spotlight and buy a heap of fake flowers for decoration … until I saw the price.  They were lovely but at $15 per stem they were not going to fit our teeny budget.
So onto plan B.
Crepe Paper!
NO glue!
NO stitching!
NO wire!
Just pretty and perfect if you are a bit on the lazy side and fancy a quick project like me!

You will need:
3 packets of crepe paper (1 main flower colour and 2 shades of green for leaves)
scissors
1 elastic band


open out your main flower colour sheet of crepe paper

gently stretch the top half of the paper being careful not to tear it

don't worry if you do tear it - just trim it to be a smooth curve shape and keep going
it will add character to your flower


roll over the end of the crepe paper a couple of times to form a little tube

keep rolling but as you roll scrunch/pleat the crepe paper with your fingers and push it into the roll.

keep hold of the bottom

it should start to look something like this

Keep rolling and scrunching until you get close to the end of the crepe paper


As you get to the end of the roll of crepe paper, trim the corner off so it has a softer, more rounded appearance

Keep rolling until you get to the end

you can either tie an elastic band around the bottom of your flower to keep it together whist you prepare the leaves or just give it a really good squeeze - it should keep it's shape.

unroll a section of each of the green (leaf colour) crepe paper and place them on top of each other

cut out two leaf shapes (rough is fine).  The base of my leaves are around 20cm (8 inches) and I cut them half way up the roll so that I could get the other leaf from the top half

you should have 4 leaves - two of each colour

stretch the tops of the leaves as you did the main flower

Using the same technique as before, take a leaf and roll & scrunch it around the bottom of your flower

I placed the lighter leaves on the inside and the darker leaves on the outside

and positioned them so that they were spread around the flower and not directly on top of each other

when you are happy with how it looks, tie an elastic band around the base of the flower so that it holds all of the leaves and the main flower

And that is it!
So simple and really effective.


You can:
  • hang them - slide some string through the elastic band
  • bunch them together 
  • throw them on a table
  • make heaps and be surrounded by a little bit of spring regardless of the time of year!


Enjoy!

Cheers
Jenny